We first begin by simply creating a new duct type called "Duct Bank" and then adjusting the fitting settings as shown in the image below.
Next, create a new duct system called "Duct Bank."
Adjust the Duct Bank duct system settings as shown below.
Then draw a simple duct layout on a floor plan view using the newly created duct type called "Duct Bank."
Create a filter called "Duct Bank."
Adjust the Duct Bank filter settings as shown below.
Next, navigate to the View tab > Visibility Graphics.
Ensure that the categories highlighted below have a check.
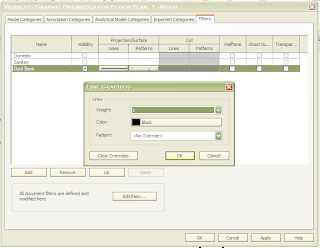
With the Visibility/Graphic Overrides dialog still open, navigate to the Filters tab. Add the filter "Duct Bank" that was previously created.
Adjust the line graphics as shown below.
Next, adjust the fill patterns graphics as shown below.
Here's the final result.
Please feel free to share any ideas that may help improve this method of creating duct banks.


